[JSON] json-simple 으로 JSON 파싱
google 의 json-simple 은 Java 에서 JSON 데이터를 encode/decode 하기 위한 경량 라이브러리이다.
(JSON.simple is a simple Java toolkit for JSON. You can use JSON.simple to encode or decode JSON text.)
0. 의존성 추가
<!-- https://mvnrepository.com/artifact/com.googlecode.json-simple/json-simple -->
<dependency>
    <groupId>com.googlecode.json-simple</groupId>
    <artifactId>json-simple</artifactId>
    <version>1.1.1</version>
</dependency>
의존성 추가 후 Exteneral Libraries 를 열어 구조를 확인하면 다음과 같다.

주요 클래스
- JSONParser: JSON 문자열을 Java 객체로 변환하는 클래스
- JSONObject: JSON 객체를 나타내는 클래스 (extends HashMap)
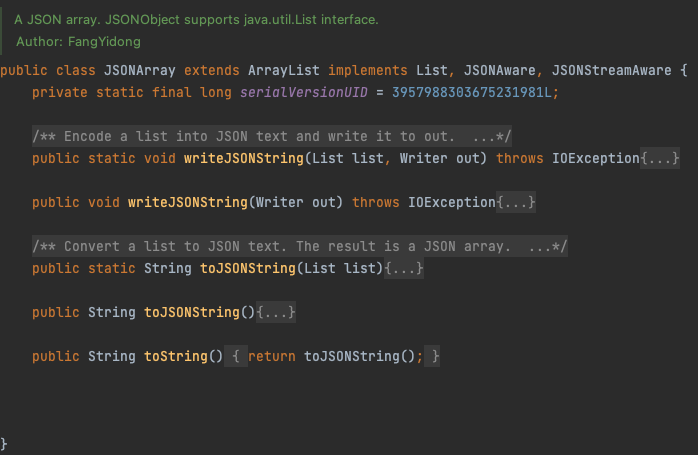
- JSONArray: JSON 배열을 나타내는 클래스 (extends ArrayList)
1. 자바 객체를 JSONObject 로 변환한 후, JSON 문자열을 파일로 저장하기
(1) 먼저, name, email, phone 멤버 변수를 갖는 Contact 객체를 JSONObject 로 변환한다.
- 이때 JSONObject 는 HashMap 을 extends 하고 있어 put()으로 JSON 객체로 매핑할 key: value 를 전달한다.
- 직접 key: value 를 전달하지 않고 편하게 JSONObject 로 변환하기 위해서는 Gson 같은 라이브러리를 써야 한다. (여기서 라이브러리 이름에 simple 이 붙은 이유가...)
(2) JSON 문자열을 파일로 저장한다.
- JSONObject.toJSONString() 으로 JSON 문자열을 반환받을 수도 있다.
- JSONObject 에서 writer 를 받아 바로 JSON 문자열을 작성해 주는 메서드가 있길래 써봄
public static void main(String[] args) {
    // [*] Object to JSON string
    Contact contact = new Contact();
    contact.setName("Gson");
    contact.setEmail("jackson123@email.com");
    contact.setPhone("010-1234-1234");

    JSONObject jsonObject = new JSONObject();   // JSONObject extends HashMap
    jsonObject.put("name", contact.getName());
    jsonObject.put("email", contact.getEmail());
    jsonObject.put("phone", contact.getPhone());

    try (Writer fileWriter = new FileWriter("src/main/resources/contact.json")) {
        jsonObject.writeJSONString(fileWriter);
    } catch (IOException e) {
        throw new RuntimeException(e);
    }
}
(3) 결과 (contact.json)
{"phone":"010-1234-1234","name":"Gson","email":"jackson123@email.com"}
2. JSON 파일을 읽어 JSONArray 데이터를 자바 객체로 파싱하기
JSONObject 를 이해했으니 JSONArray 를 이해해 보자.
먼저 JSONArray 데이터를 담는 JSON 파일을 만들기 위해 1번과 동일한 방법으로 JSONArray 객체를 문자열로 변환한 후 파일에 저장한다. ArrayList 를 extends 하고 있으니 대강 Contact 여러 개 추가해준다.
* 제네릭 타입이 명시되어있지 않아 Object 클래스를 받을 수 있기 때문에, 나처럼 실수로 JSONObject 가 아닌 Contact 객체를 추가하고 writeJsonString() 을 호출하면 해당 객체의 toString() 문자열이 출력되게 된다. 아래 코드 참고.
JSONValue.writeJSONString()
public static void writeJSONString(Object value, Writer out) throws IOException {
    if(value == null){
        out.write("null");
        return;
    }

    if(value instanceof String){
        out.write('\"');
        out.write(escape((String)value));
        out.write('\"');
        return;
    }

    if(value instanceof Double){
        if(((Double)value).isInfinite() || ((Double)value).isNaN())
            out.write("null");
        else
            out.write(value.toString());
        return;
    }

    if(value instanceof Float){
        if(((Float)value).isInfinite() || ((Float)value).isNaN())
            out.write("null");
        else
            out.write(value.toString());
        return;
    }

    if(value instanceof Number){
        out.write(value.toString());
        return;
    }

    if(value instanceof Boolean){
        out.write(value.toString());
        return;
    }

    if((value instanceof JSONStreamAware)){
        ((JSONStreamAware)value).writeJSONString(out);
        return;
    }

    if((value instanceof JSONAware)){
        out.write(((JSONAware)value).toJSONString());
        return;
    }

    if(value instanceof Map){
        JSONObject.writeJSONString((Map)value, out);
        return;
    }

    if(value instanceof List){
        JSONArray.writeJSONString((List)value, out);
        return;
    }

    out.write(value.toString());	// here!
}
(1) JSONArray 객체를 이용해서 Array 형태의 JSON 데이터 파일을 만든다.
JSONArray jsonArray = new JSONArray();
jsonArray.add(jsonObject);
jsonArray.add(jsonObject);
jsonArray.add(jsonObject);

try (Writer fileWriter = new FileWriter("src/main/resources/contactArray.json")) {
    jsonArray.writeJSONString(fileWriter);
} catch (IOException e) {
    throw new RuntimeException(e);
}
contactArray.json
[{"phone":"010-1234-1234","name":"Gson","email":"jackson123@email.com"},{"phone":"010-1234-1234","name":"Gson","email":"jackson123@email.com"},{"phone":"010-1234-1234","name":"Gson","email":"jackson123@email.com"}]
지금 보니까 JSONObject -> HashMap 이라서 name - email - phone 순으로 넣었는데 자기 마음대로 출력되어 있다 ㅋㅋㅋ
(2) contactArray.json 파일을 읽어서, JSONArray 를 통해 List<Contact> 객체로 파싱 한다.
- JSONParser.parse() 는 Object 를 반환하기 때문에, instanceof 연산자로 체크 후에 파싱을 수행한다.
- 와 진짜 너무 피곤하다. 다음에 junit 테스트 작성해서 List<Contact> 검증해봐야지...
public static List<Contact> parseJsonArray(String fileName) {
    JSONParser jsonParser = new JSONParser();
    List<Contact> contacts = new ArrayList<>();

    try (Reader fileReader = new FileReader(fileName)) {
        Object parsedObject = jsonParser.parse(fileReader);

        if (parsedObject instanceof JSONArray) {
            JSONArray jsonArray = (JSONArray) parsedObject;

            for (Object o : jsonArray) {
                if (o instanceof JSONObject) {
                    JSONObject jsonObject = (JSONObject) o;
                    Contact contact = new Contact();
                    contact.setName((String) jsonObject.get("name"));
                    contact.setEmail((String) jsonObject.get("email"));
                    contact.setPhone((String) jsonObject.get("phone"));

                    contacts.add(contact);
                }
            }
        }
    } catch (IOException | ParseException e) {
        throw new RuntimeException(e);
    }

    return contacts;
}